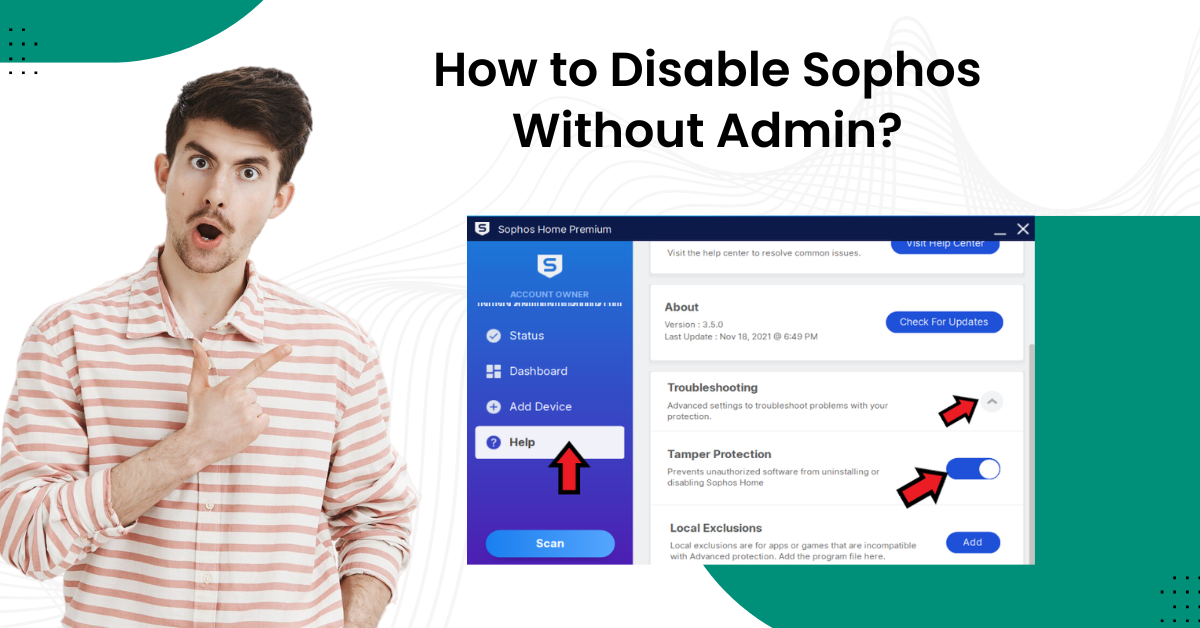
How to Disable Sophos Without Admin?
No doubt Sophos runs smoothly on all compatible devices and provides powerful protection. However, in some situations, you might need to disable the program temporarily to install a new program. Moreover, there could be other reasons for doing that. The process to disable Sophos is simple, but you also need admin access to do it. However, worry not, because we are going to help you out to streamline the process.
The Process to Disable Sophos Program
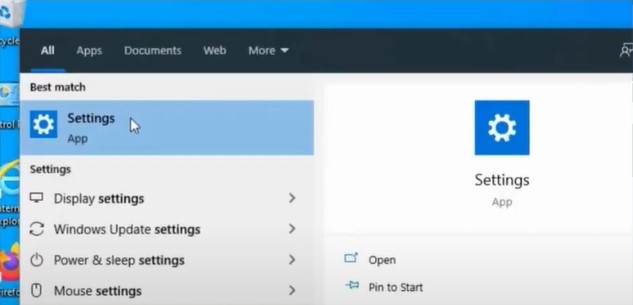
1. First of all, open the Windows start button, search Settings, and open it

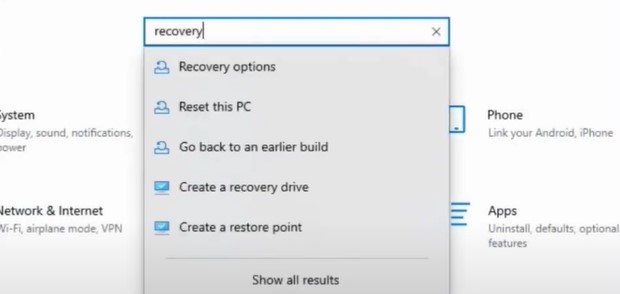
2. Now, in the search bar, search Recovery and click on the Recovery Options.
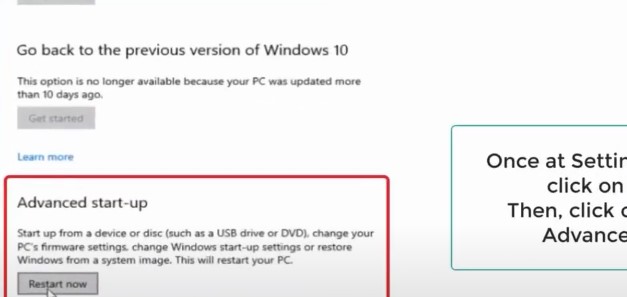
3. After that, move to the Advanced Start-Up section and choose Restart Now.
4. Next, click on the Troubleshoot option and then click on ‘Advanced Options.’
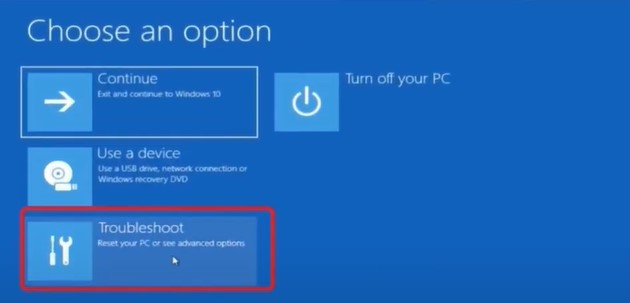
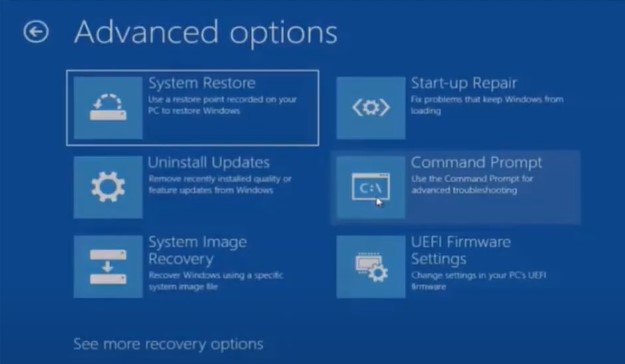
5. In the next step, select Command Prompt, then choose your Windows account to proceed.
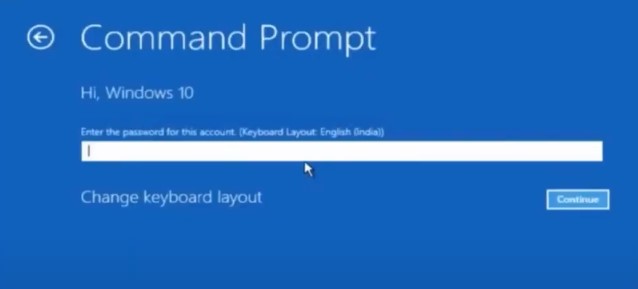
6. Then, you are required to enter the administrator account password and click on Continue.
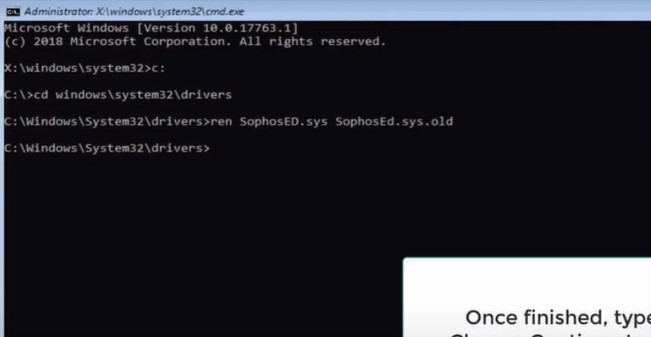
7. In the new window, enter the command C: cdWindows\system32\driver s>ren SophosED.sys SophosED.sys.old.
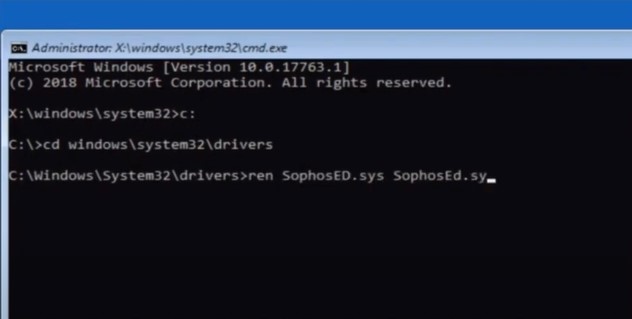
8. Once it is done running, type Exit and press the Enter button.
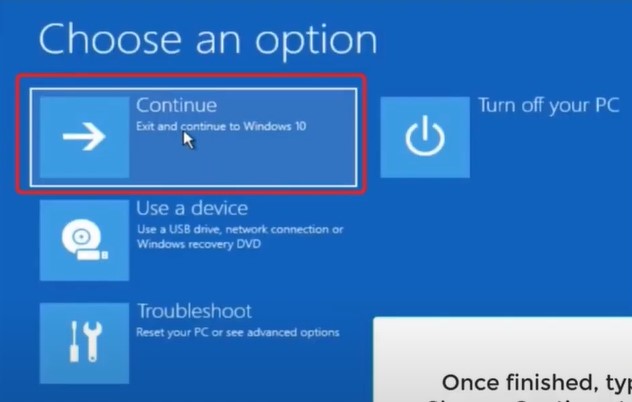
9. Now, click on Continue to return to the Windows page.
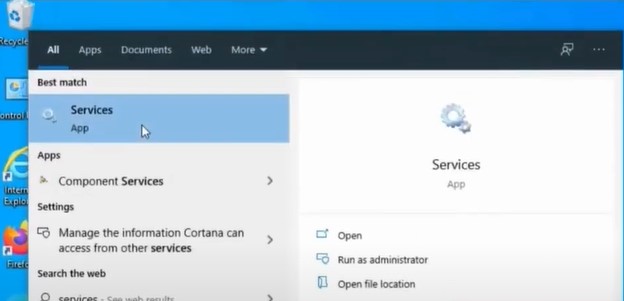
10. Moreover, click on the Windows search bar, type Services, right-click on the Services app, and select Run as administrator option.
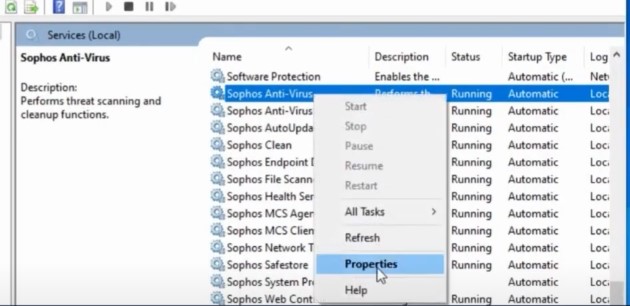
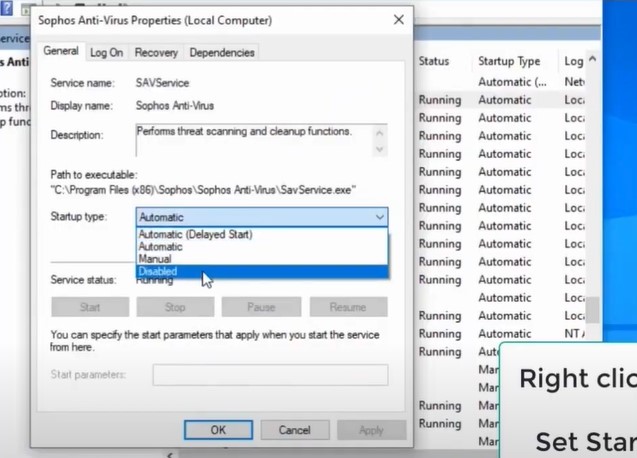
11. After that, right-click on the Sophos antivirus program and select Properties from the open options.
12. Next, in the General Type section, click on the Startup Type drop-down field and select the option Disabled.
Also Read:- How to Uninstall Sophos Antivirus on Mac?
13. Now, click on the Apply option and choose OK.
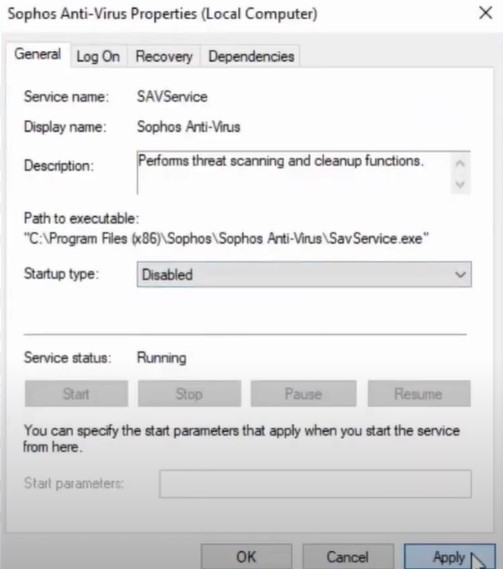
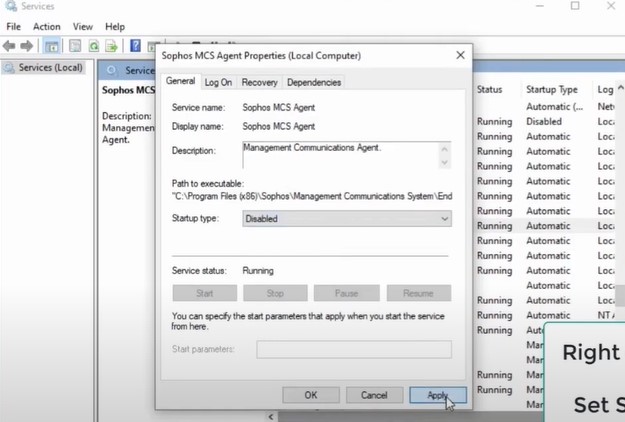
14. In addition, you have to remove the same steps to turn off the rest of the Sophos antivirus program on your device.
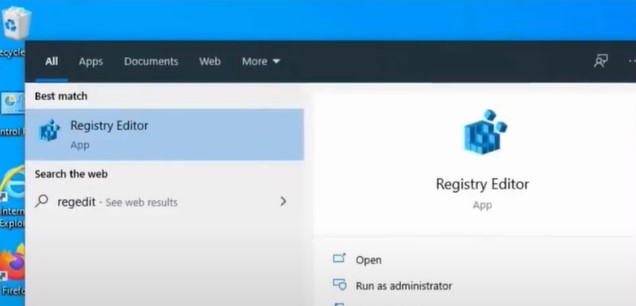
15. When the earlier process is complete, exit from the Services window, click the Windows search bar, regedit, and open Registry Editor.
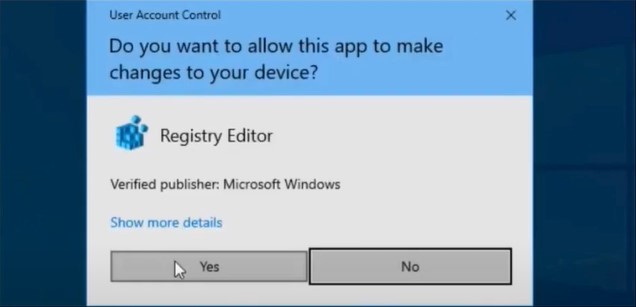
16. Now, in the User Account Control window, select the Yes option.
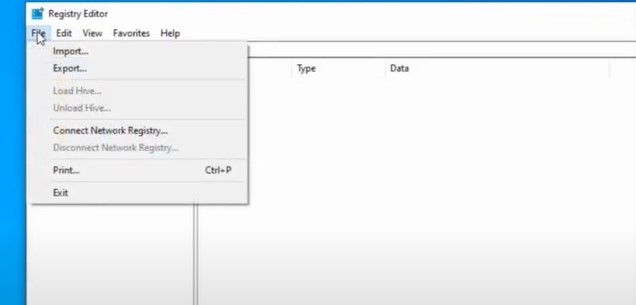
17. Once the Registry Editor page comes on the screen, click File and then choose the Export option.
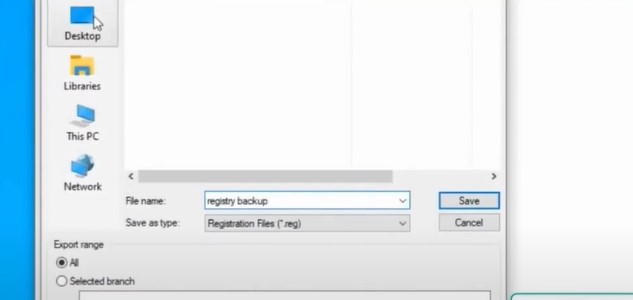
18. Next, type a name for the file and then choose the Save option.
19. When the Registry Editor navigation page opens, type in HKEY_LOCAL_MACHINE\SYSTEM\CurrentControlSet\Services\Sophos MCS Agent.
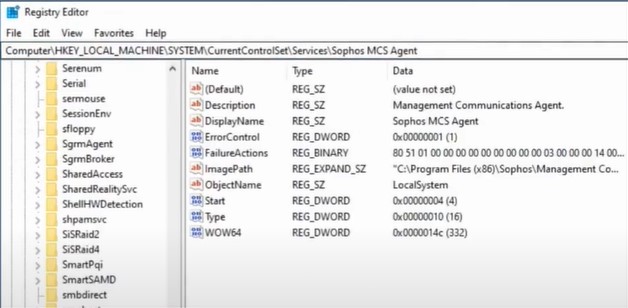
20. Click Start, set the value data to 4, and then click on OK.
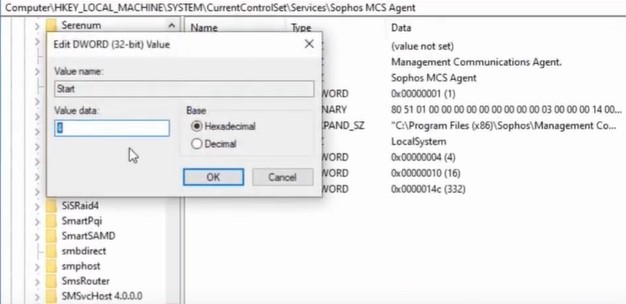
21. Head to the navigation bar once again and access HKEY_LOCAL_MACHINE\SYSTEM\CurrentControlSet\Services\Sophos Endpoint Defense\TamperProtection\Config.
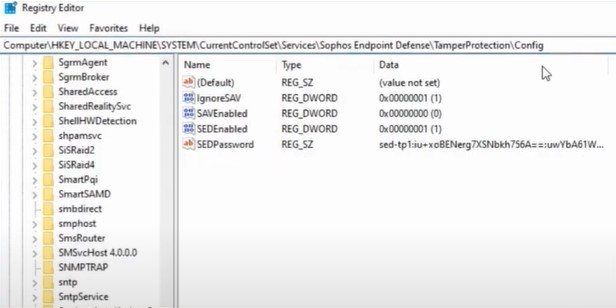
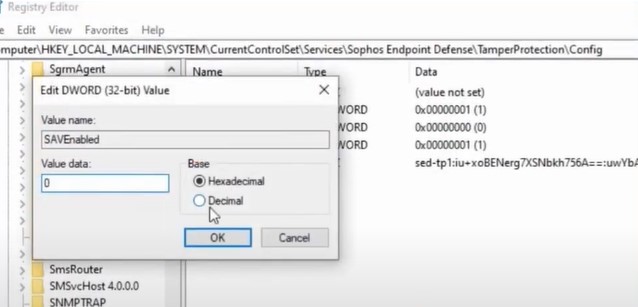
22. After that, select SAVEnaled, set the value data to 0, and click on OK.
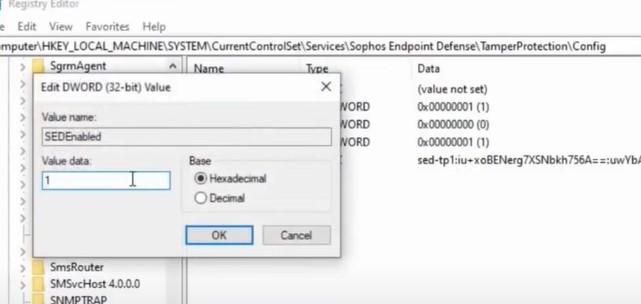
23. Next, choose SEDEnabled, set the value data to 0, and then select OK.
24. Now, go to the navigation bar once again and access HKEY_LOCAL_MACHINE\SOFTWARE\WOW6432Node\Sophos\SAVService\TamperProtection.
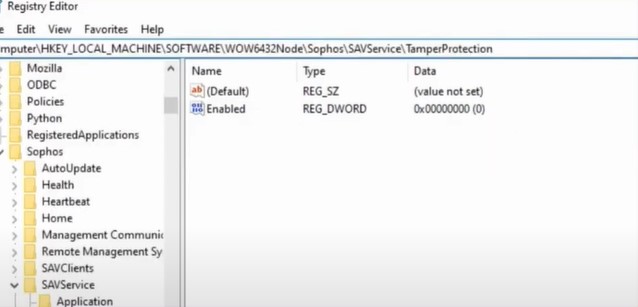
25. Choose the option enabled, set the value data to zero (0), and click on the OK button.
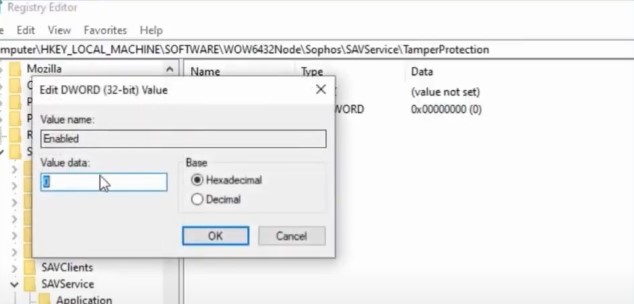
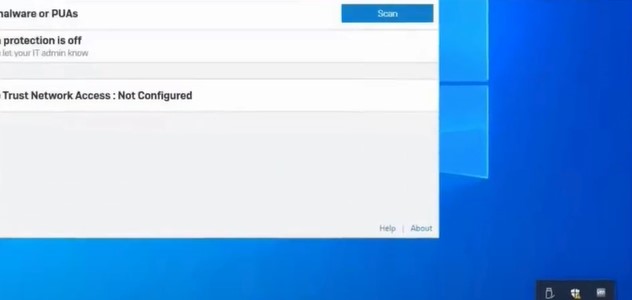
26. Next, you need to open the Sophos application.
27. After that, move to the Settings tab and check the box that says Override Sophos Central Policy for Upto 4 Hours to Troubleshoot.
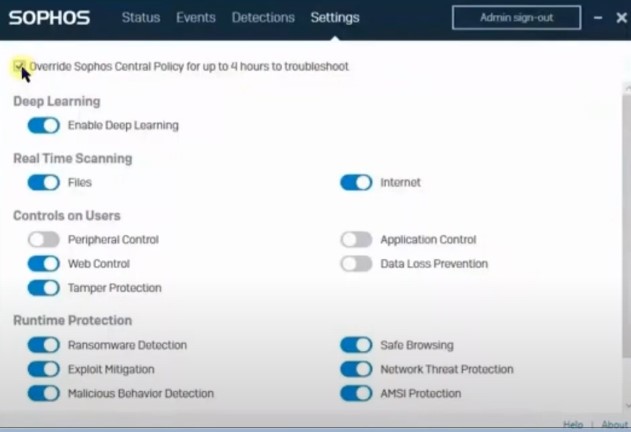
28. Henceforth, go ahead toggle off the slider to disable a function you would like to disable temporarily.
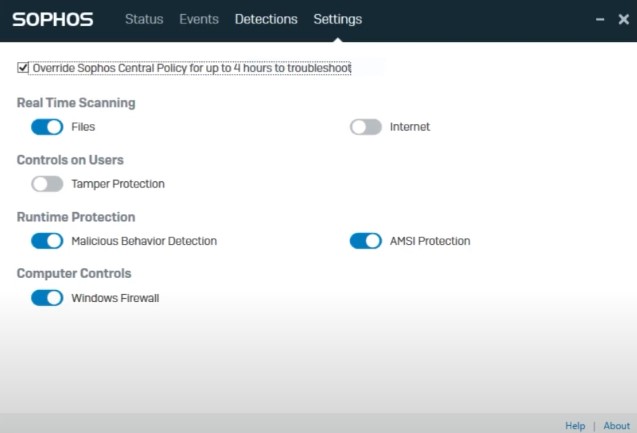
29. Finally, the Sophos program will be disabled on your device.
Conclusion
The process to disable the Sophos program could be difficult for some if they are doing it for the first time. Also, not knowing the proper procedure can lead to errors and make things more complex. That’s why you can follow our well-tailored and proven guide to complete the process without any hassle. In addition, we will recommend you get further help and resources if you are still struggling to disable Sophos program on your device.


 Bitdefender antivirus issues
1 min ago