Troubleshoot Webroot Antivirus Not Working
Is your Webroot antivirus not working properly on your system? It may be because of a corrupted installation or update failures. Conflicts with other security software or incorrect system settings may also cause this issue.
Sometimes, Webroot might not be fully compatible with your operating system version, resulting in problems when using the antivirus. Malware interference might be another reason Webroot antivirus is not working properly.

A malfunctioning antivirus leaves your system vulnerable to harmful threats, potentially causing data loss, identity theft, or system slowdowns. So, you need to seek the right solutions. If you want to resolve the issue of Webroot antivirus not working, follow our step-by-step tutorial instructions.
Potential Issues When Troubleshooting Webroot Not Working
When you try to troubleshoot Webroot not working issue, you may encounter many potential problems, such as:
-
Errors during installation
-
Software performance issues
-
Conflicts with other security software
Top 3 Solutions to Fix Webroot Antivirus Not Working Issue
Take a glance at these quick solutions to successfully troubleshoot the issue of Webroot antivirus not working:
Method 1: Make Sure That the Browser Is Up-To-Date
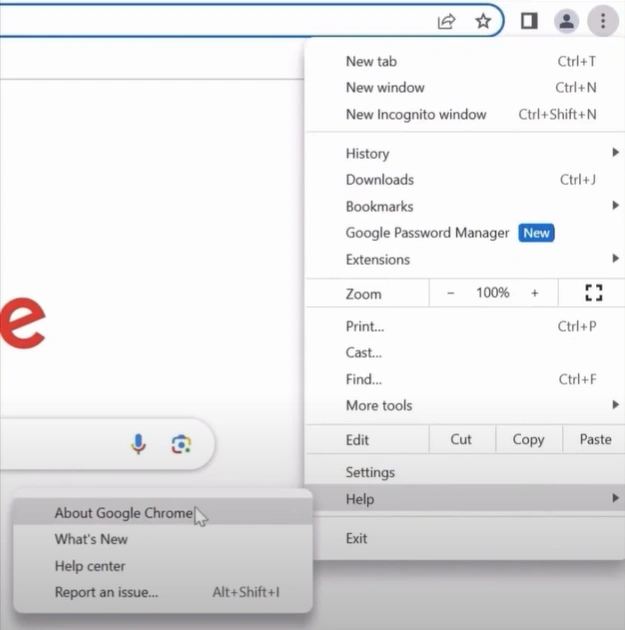
Step 1: Open Google Chrome and click on the three dots on the top right side of the screen.

Step 2: Hover over to Help and select About Google Chrome.
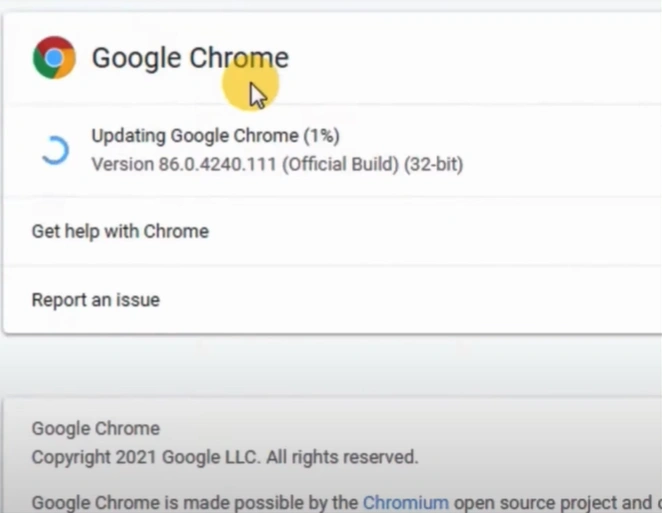
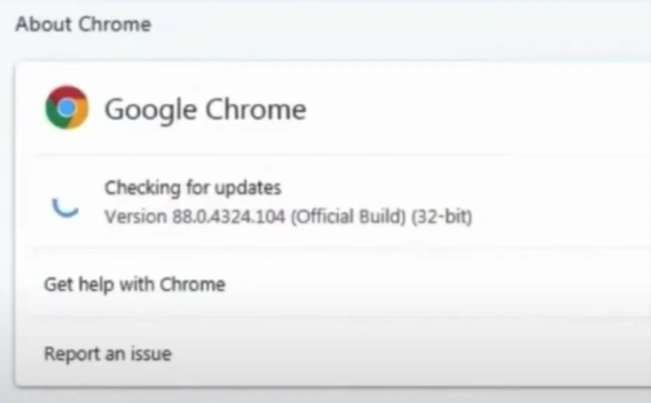
Step 3: It’ll start checking and downloading the updates automatically if there’s an update available.
Step 4: Once the update is complete, click Relaunch and wait for the page to relaunch.

Step 5: Once the page relaunches, you’ll see the Google Chrome is Up to Date message.
Method 2: Restart the Computer
Step 1: Click on the Windows start button and click the power icon on the bottom right side.

Step 2: Click Restart.

Step 3: Wait for the system to turn back on.
Method 3: Uninstall & Reinstall Webroot
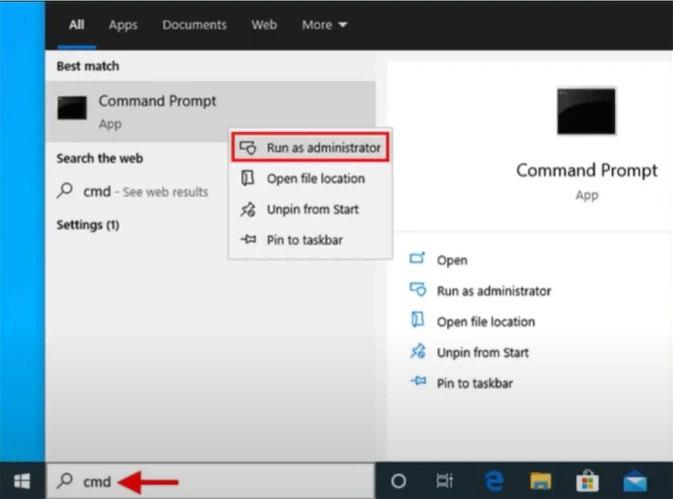
Step 1: Click on the Windows icon, then search cmd.

![]()
Also Read:- How to Stop Webroot From Charging Your Credit Card?
Step 2: Right-click Command Prompt from the result and click Run as Administrator.
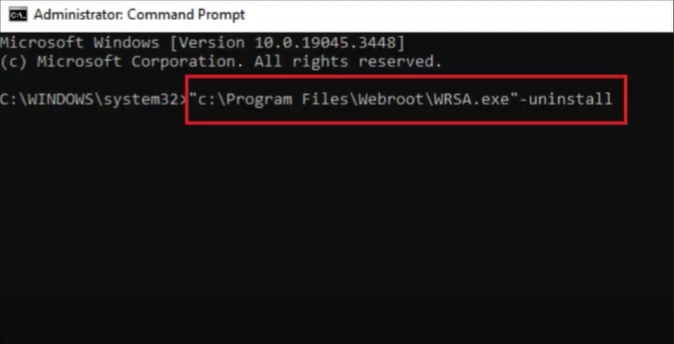
Step 3: Run the command “C:\Program Files\Webroot\WRSA.exe”-uninstall.
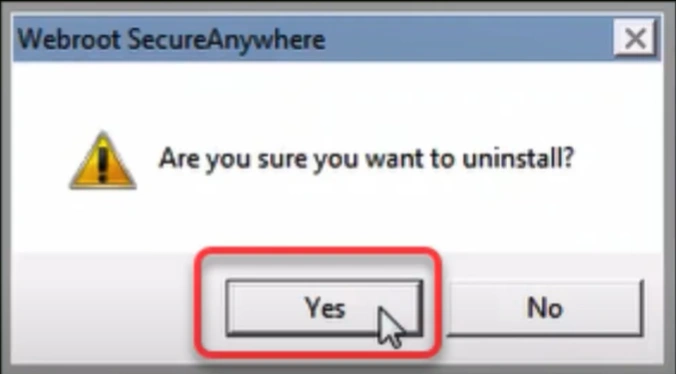
Step 4: Click Yes in the uninstallation pop-up prompt.
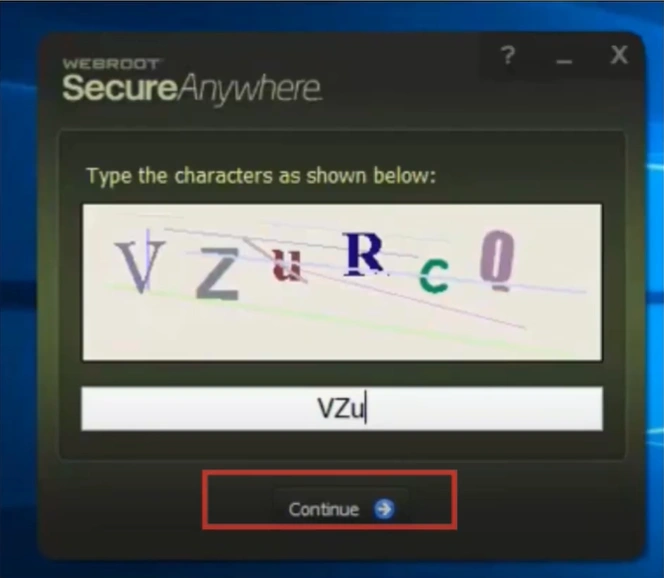
Step 5: Fill in the reCAPTCHA and click Continue.
Step 6: Open the web browser and visit the official Webroot website.
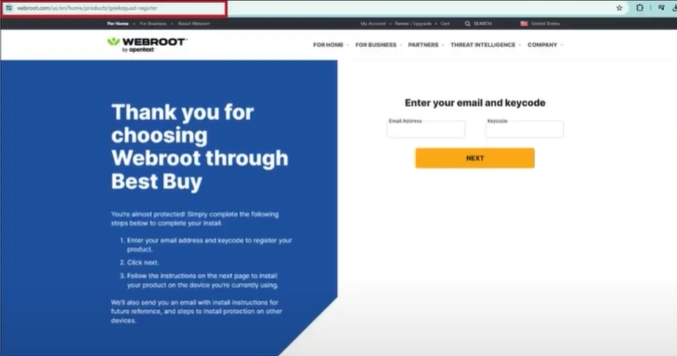
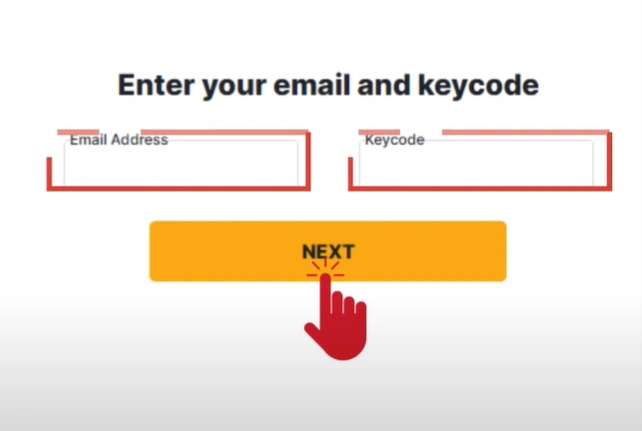
Step 7: Enter your email ID and product keycode, and click Next.
Step 8: Click Download Now and wait for the file to download.

Step 9: Open the downloaded file.

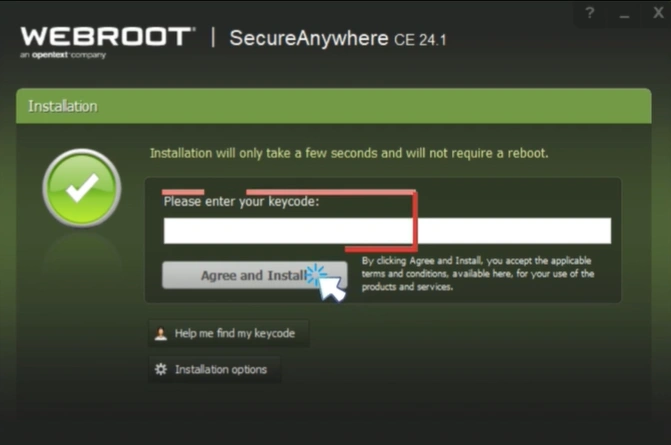
Step 10: Enter the product keycode again, then click Agree and Install.
Step 11: Click Yes in the User Account Control window, and it’ll start scanning.

In a Nutshell
Here we conclude this detailed guide on the solutions to troubleshoot Webroot antivirus not working issue. Follow all the above-discussed instructions carefully and address the potential problems that may arise.
If you are still facing difficulties, you can consider seeking expert help to troubleshoot Webroot antivirus issues.
