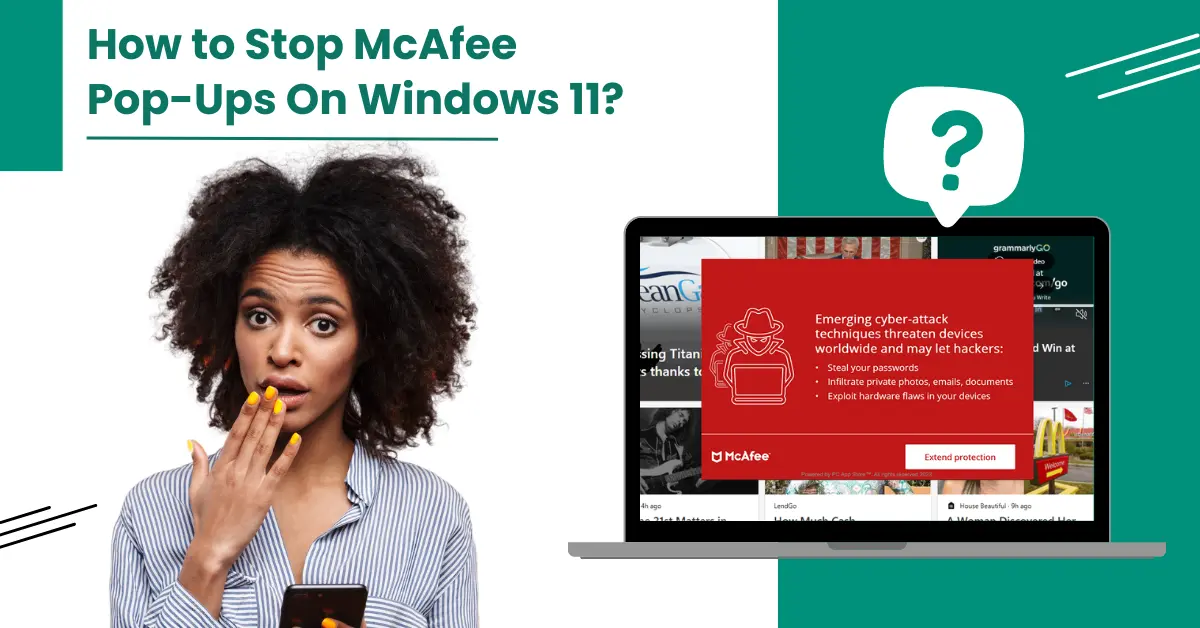
How to Stop McAfee Pop-Ups On Windows 11?
McAfee is a well-known antivirus program that is useful for keeping your system safe from malware. However, sometimes, users may feel that they can manage Malware at one point but not pop-ups. A large number of antivirus pop-ups warn you about potential threats or provide information about the updates. While some of them may be useful, they can become a major trouble.
Is your important work getting interrupted due to McAfee pop-ups? If yes, then fortunately there are some effective methods to stop McAfee pop-ups on Windows 11. Let’s delve into the process!

Why Do McAfee Pop-Ups Show Up On The System?
McAfee pop-ups show up as they warn you about possible threats like updates or scans. Additionally, sometimes reminders and promotional offers show up on the screen to renew your subscription. While these notifications are important, usual interruptions can be annoying.
Methods to Stop McAfee Pop-Ups On Windows 11
Follow these top three effective methods to stop McAfee pop-ups on Windows 11. Take a glance at it.
Method 1: Turn Off McAfee Notifications
Step1: First, open your McAfee program.
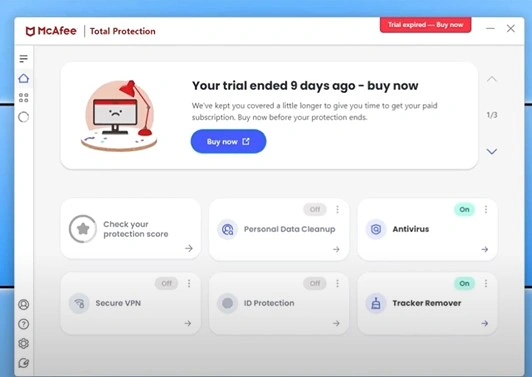
Step 2: Click the gear icon towards the bottom left side of the screen to open Settings.
![]()
Step 3: Go to General Settings and click Informational Alerts.
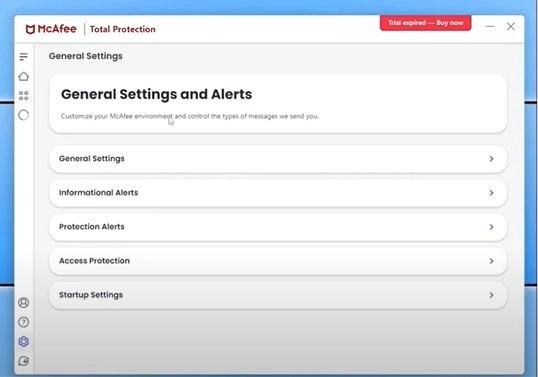
Step 4: Uncheck the options under Informational Alerts and click Apply.
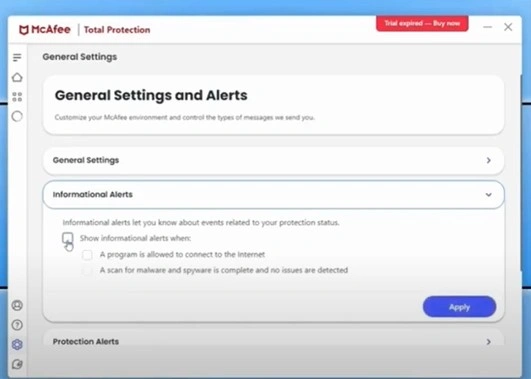
Step 5: Next, click Protection Alerts.
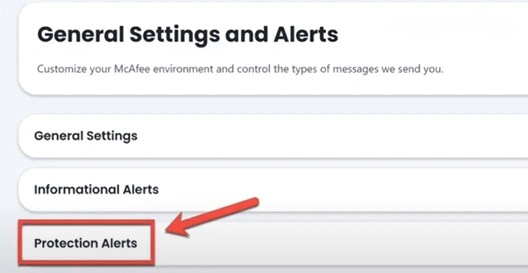
Step 6: Uncheck. Don’t show an Alert When Firewall is Off option, then click Apply.

Method 2: Disable Notifications From Window
Step 1:Right-click on the Windows icon and select settings.
![]()
Step 2: Click on System and select Notifications.
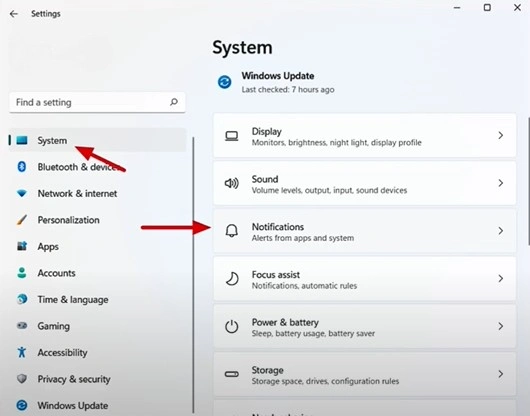
Step 3: Scroll down and turn off notifications of the apps that are causing the issue.
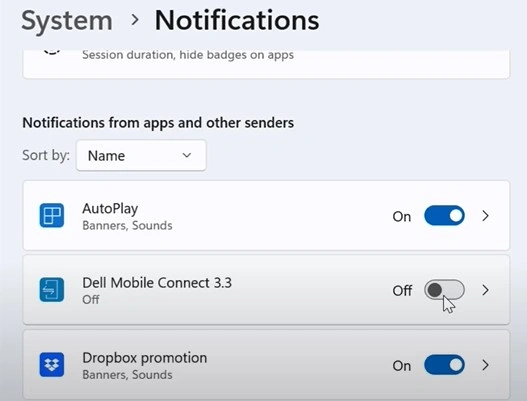
Step 4: Once done, click additional settings, then uncheck all the three options.

Also Read:- Disable/Turn Off Annoying McAfee Notification and Pop-Up
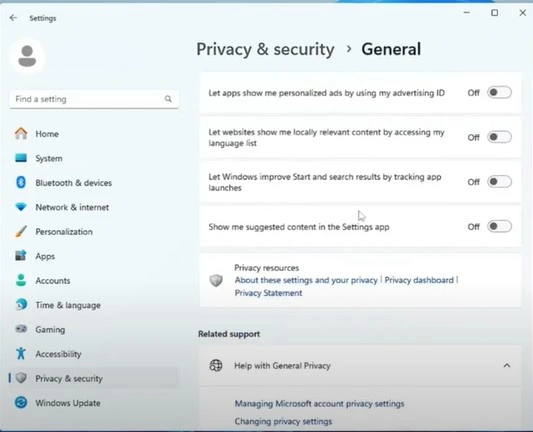
Step 5: Now, click on Privacy & security in the left panel.
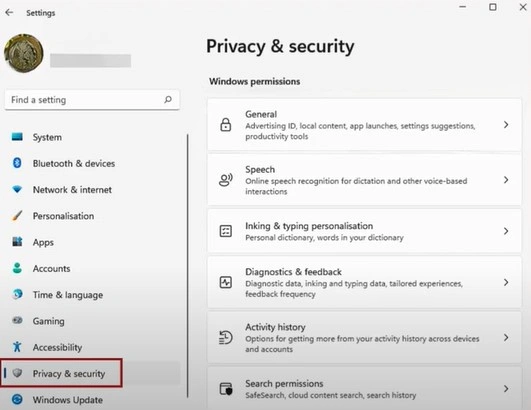
Step 6: Click on General, disable all four notifications, and close the window.
Method 3: Check Your Browser Settings
Step 1: Open your web browser.

Step 2: Click the three dots on the top right side of the screen.
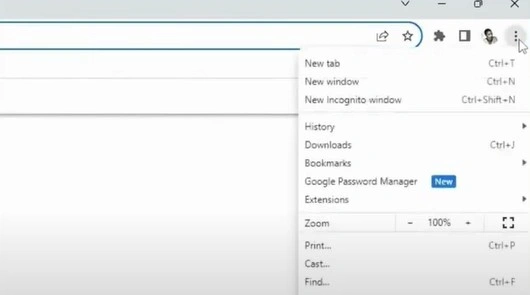
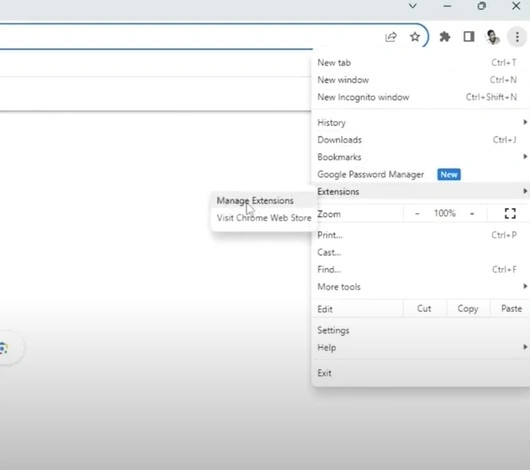
Step 3: Go to Extensions and click Manage Extensions.

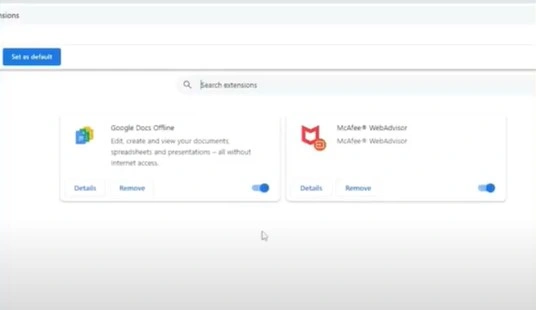
Step 4: If you find extensions related to McAfee or programs you do not identify, turn off the toggle, click Remove, and then click Remove on the prompt.
Step 5: Once done, click on the three dots again and select Settings.
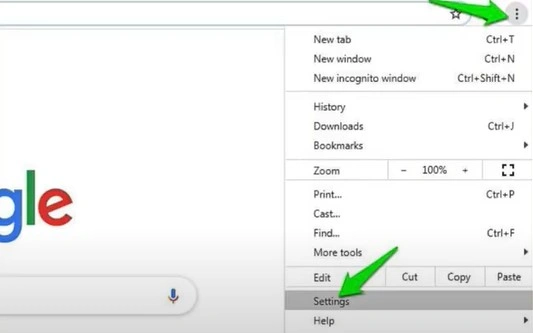
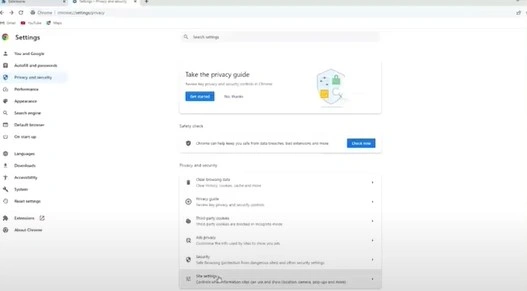
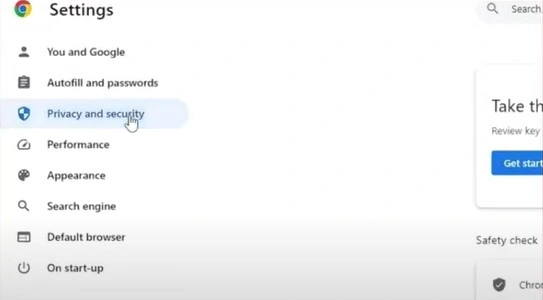
Step 6: Go to Privacy and Security from the left panel and click Site Settings.
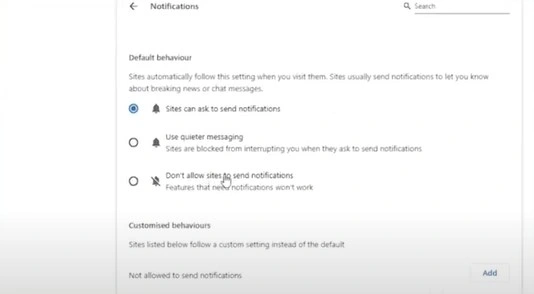
Step 7: Select Notifications, then check the Don’t Allow Sites to Send Notifications option.
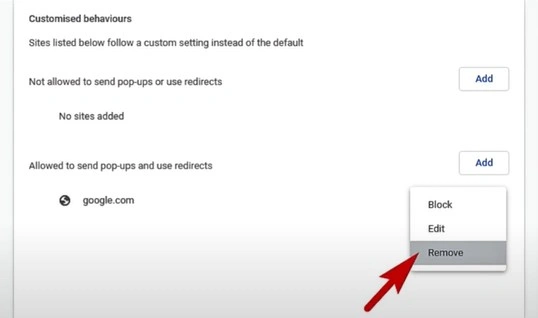
Step 8: Under Customised Behaviours, check if any websites have been added to the allowed list.
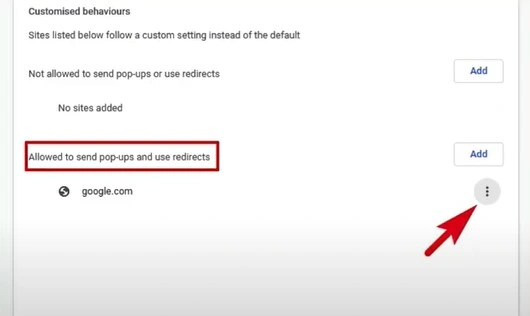
Step 9: If any website has been added, click on the three dots and select Remove.
Step 10: Click Privacy and Security again on the left side of the panel, then click Third party Cookies.
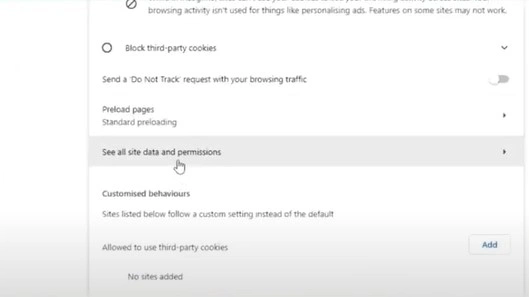
Step 11: Click See All Site Data and permissions, click Clear All Data, then click Clear on the prompt to proceed.
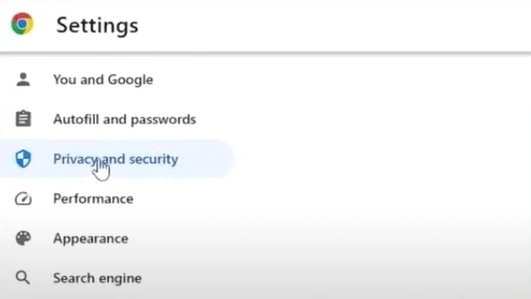
Step 12: Once done, click on Privacy and Security again and select Clear Browsing data.
Step 13: Go to the Advanced tab and set the time range to All Time.
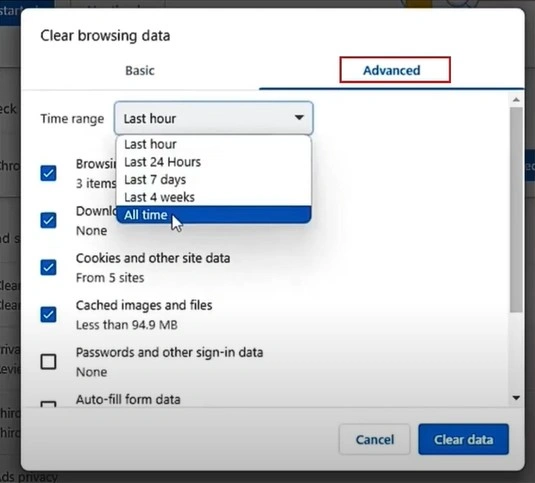
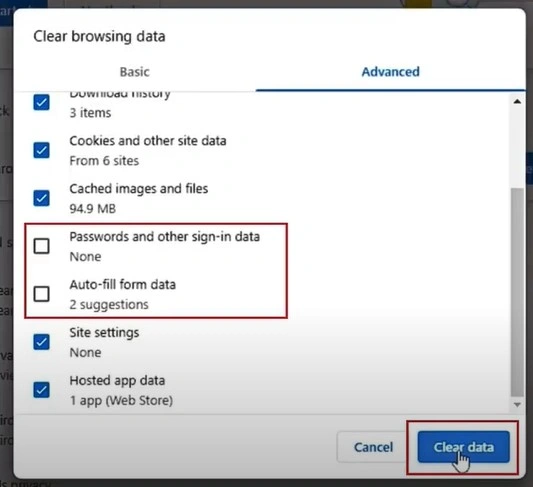
Step 14: Check all the options except for Passwords and other sign-in data and Auto-fill form data, and click Clear Data.
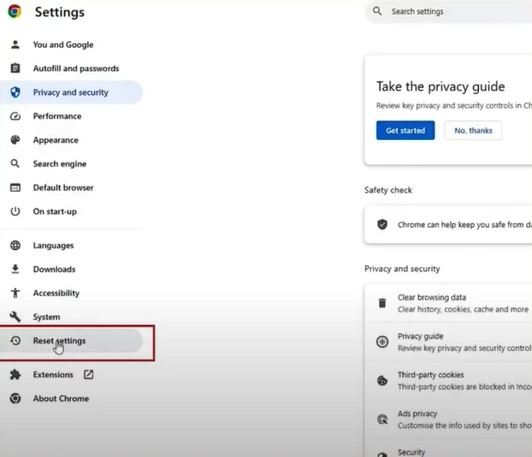
Step 15: Once done, click Reset Settings on the left side of the window panel.
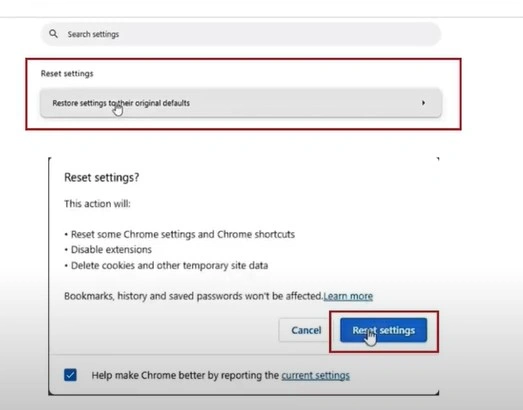
Step 16: Click Restore Settings to their Orginal Defaults and click Reset Settings.
Step 17: Close the Window.
Summary
Do you now get rid of McAfee pop-ups on your Windows 11? If yes, then it’s great! But if not, then you should take your device to an expert for spyware and virus diagnosis and removal.


 Bitdefender antivirus issues
1 min ago