How to Disable Bitdefender on Windows/Mac?
Have you tried to disable Bitdefender antivirus program on your device but are unable to do so? In order to thoroughly disable the program from your device, you must have a deep knowledge of the whole procedure. Also, if you are trying to disable the Bitdefender program on your device for the first time, there is a huge chance of making mistakes. Hence, We have shared some pin-point procedures to disable Bitdefender on Windows and Mac devices. Hence, go through the content below to complete the process for your respective operating system.
Step-By-Step Process to Disable Bitdefender Windows
If you want to fix the problem of disabling the Bitdefender program on your Windows device, follow these two steps in the below section to disable Bitdefender.

Step 1: Making Changes in the Protection
-
From your system tray, access the Bitdefender program on your Windows.
-
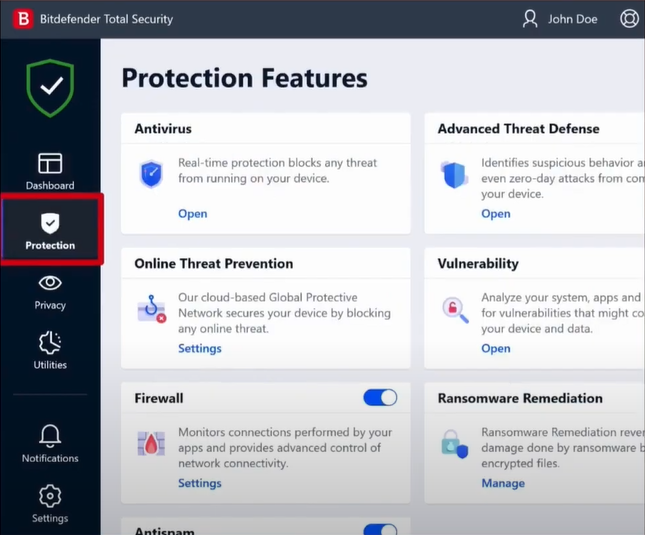
When the Bitdefender app opens on the screen, select the Protection option from the left side pane.
-
Move to the Advanced tab after selecting the Open option in the Antivirus section.
-
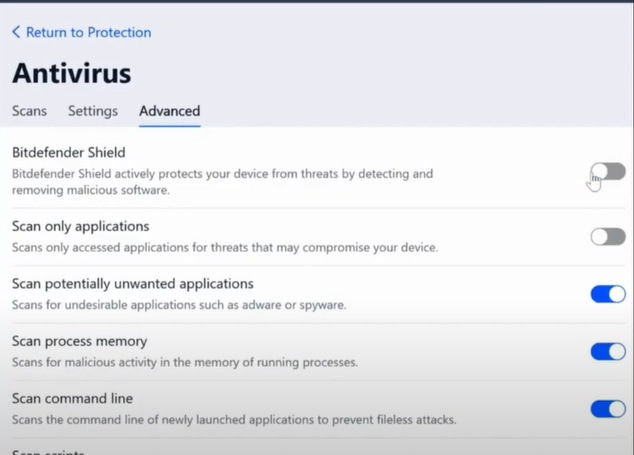
Go to the toggle of Bitdefender Shield and click on it to turn it off.
-
When the user account windows prompt on the screen, choose the Yes option.
-
Furthermore, a new pop-up window will appear on the screen; choose the duration from the drop-down menu and then select click OK.
-
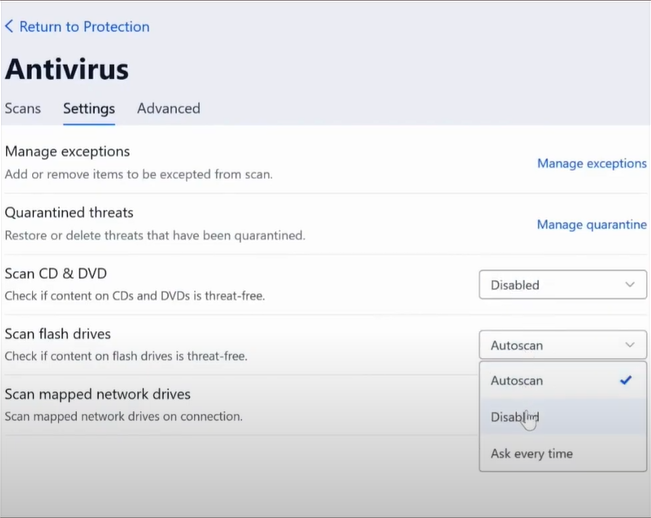
Now, you need to head to the Settings tab and choose the Disabled option for Scan CD & DVD, Scan Mapped Network Drives, and Scan Flash Drives.
-
Moreover, choose Return to Protection and then the Open option for Advanced Threat Defense.
-
Now, go back to the Settings tab and turn the Advanced Threat Defence toggle off.
-
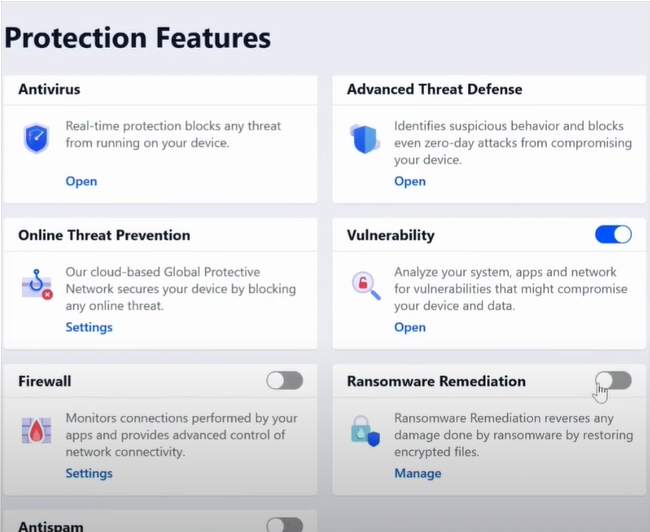
Move back to the Return to Protection once again and then turn off the toggle for Firewall, Antispam, Ransomware Remediation, and Vulnerability.
-
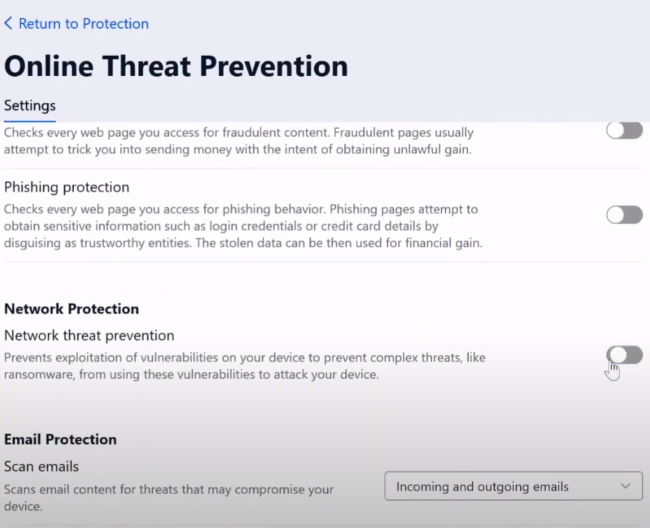
In the Online Threat Prevention pane, select the Settings option. Also, turn the toggle off for the option under Web Protection and Network Protection.
-
Henceforth, go to the Email Protection menu and click on the drop-down button to select the 'Don't scan emails' option.
Step 2: Making Changes in the Privacy
-
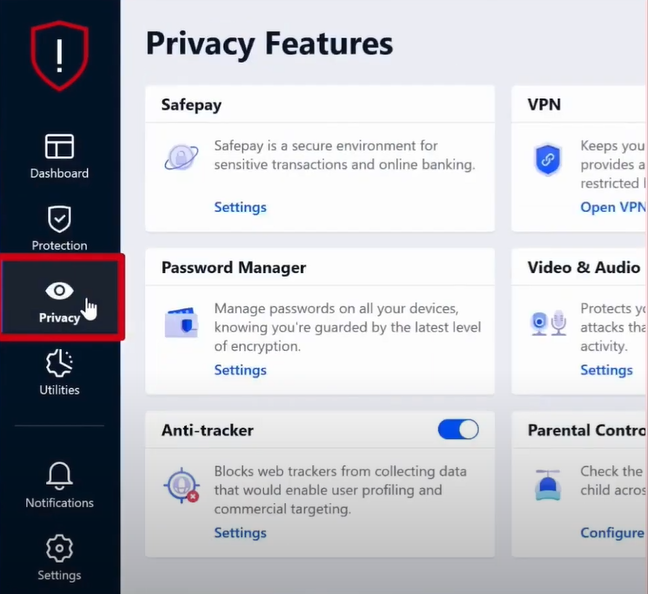
Now, click on the Privacy option below the Protection.
-
In the Safeplay screen, move to the Settings tab and switch off all three toggles.
-
After that, choose the Return to Privacy option.
-
Now, select the Settings option in the Password Manager tile.
-
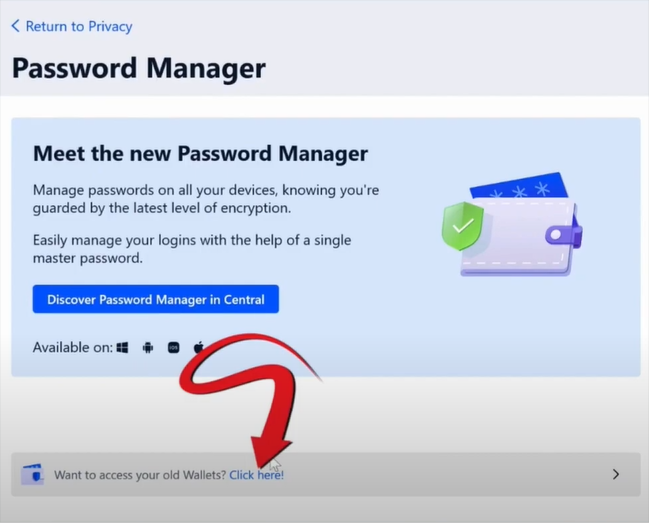
Next, select the option 'Click Here!' at the bottom of the page and move to the Settings tab.
-
Choose the toggle of Wallet to turn it off and then select the Return to Privacy option.
-
After that, turn off the Anti Tracker toggle and choose the Open VPN option to disconnect the Bitdefender VPN.
-
Moreover, select the Settings option under the Video & Audio Protection tile.

-
After accessing the Settings tab on the open window, toggle off the Webcam Protection and Microphone Monitor options.
-
Afterward, select the option Return to Privacy.
-
In the Parental Control Pane, select the Configure option and sign it if you see the prompt. Under the profile, click View.
-
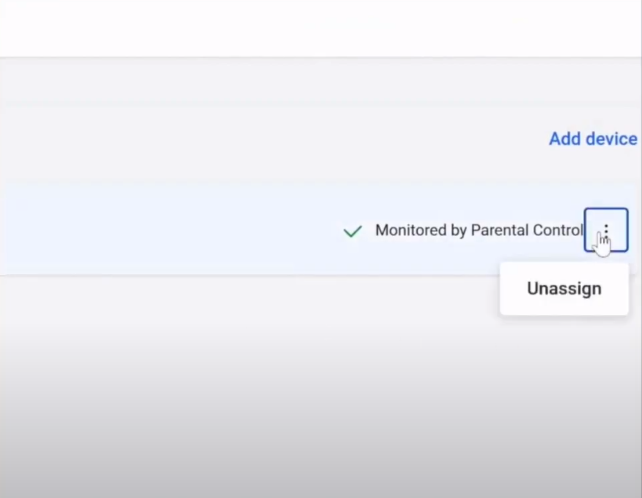
In addition, select the three dots next to the device and select the Unassign option.
-
Now, move to Utilities and choose the Settings option under Profile.
-
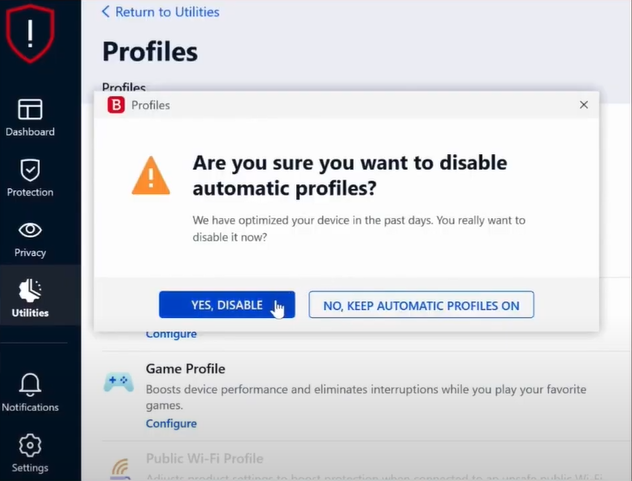
After that, click on the toggle Activate Profiles Automatically to turn it off.
-
If a prompt appears for the confirmation, then Click on the Yes, Disable button.
-
Finally, the process of turning off Bitdefender windows will be complete.
Step-By-Step Process to Disable Bitdefender Mac
Here are the steps you need to follow to disable the Bitdefender on your Mac device.
-
First, you are required to select the B icon from the top bar of your Mac desktop.
-
After that, you need to choose the Open Antivirus Interface option and wait for a while.
-
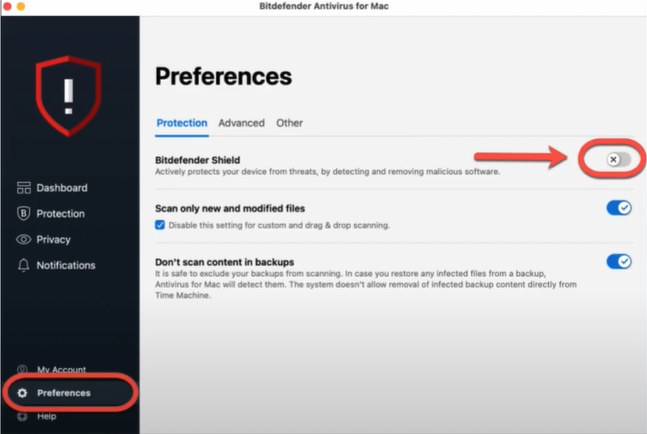
At the bottom side of the right pane, select the Preference option and then toggle off Bitdefender Shield.
-
In the pop-up window, specify a duration from the drop-down and select OK.
-
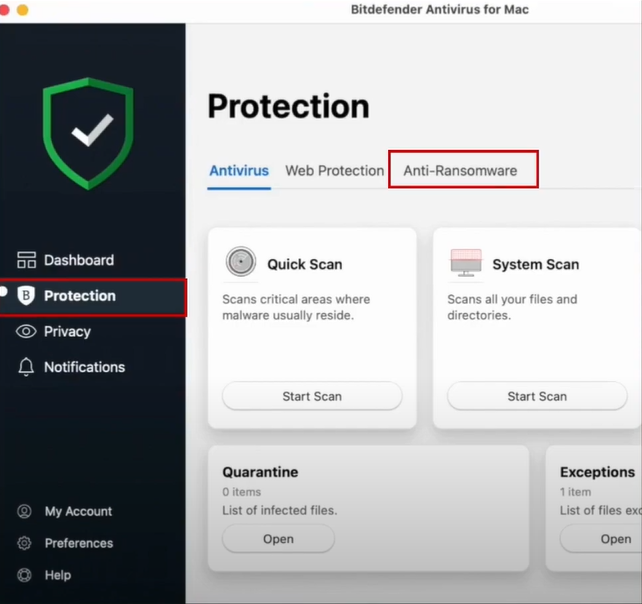
Now, move to the Protection pane and select the Anti-Ransomware tab.
-
Next, you have to toggle off the Safe Files and Time Machine Protection option.
-
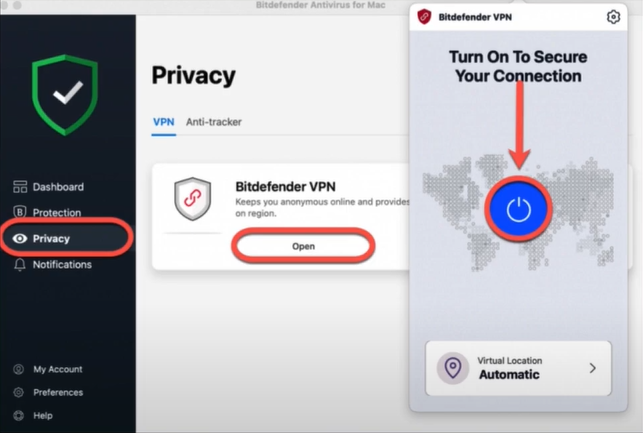
Furthermore, head to Privacy and choose the Open option under the Bitdefender VPN. Also, select the option to disconnect the VPN in a new window.
-
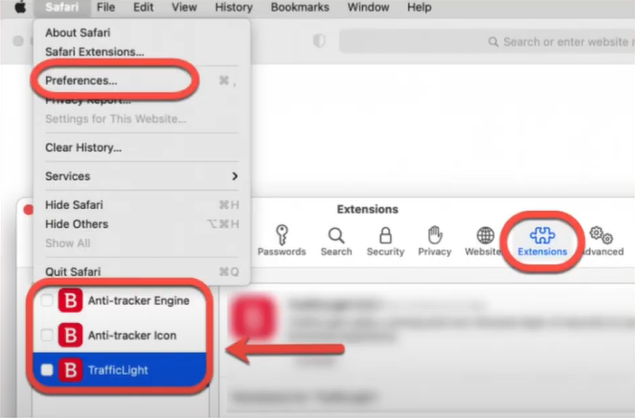
After opening the Safari, go to the Safari menu and click on Preference.
-
Now, you will be able to access the Extension tab and deselect the checkbox for the anti-tracker and traffic light.
-
Finally, the process to disable Bitdefender on your Mac device will be complete.
Conclusion
Here, We have shared the two fundamental methods to disable Bitdefender antivirus on Windows and Mac devices. You can use either of both methods depending on the device you are using. Also, if the process is not successful on the first attempt, then try repeating the process one more time. In case the program is still not disabled properly from your device yet then look for additional help.
Frequently Asked Questions
Sometimes, the Bitdefender antivirus can stop you from installing any specific application or running any program. In this case, the best solution is to disable the Bitdefender security for a while and then enable it again. Also, in other cases, the security program can lead to conflicts on your device, and you may need to disable it. You can use the online procedure to disable the product according to the OS device you are using.
Here are the steps you need to follow to disable Bitdefender from your iOS device.
- On the iOS device home screen, tap and hold the Bitdefender app icon.
- After that, all the apps will start to wiggle.
- Now, you need to tap on the (-) sign on the Bitdefender app.
- Next, select the Uninstall option from the open list.
- Now, the app will be removed from your device.
These are the steps you need to follow if you want to get Bitdefender on your device.
- For the first step, you need to browse the official Bitdefender webpage on your device.
- After that, look for the product you want to download and select the Download button.
- After a while, the download process will be complete; double-click on the setup file in the browser to move forward.
- Then, follow the instructions on the installation prompt to complete the process.
- Now, activate the Bitdefender security on your device to protect it from any threats.


 Bitdefender antivirus issues
1 min ago