![Bitdefender Installation Failed [Fixed]](https://antivirustales.com/public/upload/blog/67d29dc442997_bitdefender-installation-failed--fixed-1-.webp)
Bitdefender Installation Failed [Fixed]
Bitdefender installation issues are common, with the Web Installer error being among the most prevalent. Other common causes include changes to the installation file name, incomplete downloads, and missing installation packages.
Sometimes, Bitdefender installation failure may also result from network issues or firewall settings blocking server access.

What can we do to fix the Bitdefender installation failure issue? You can try a few solutions to troubleshoot the problem and get the antivirus running. Here, we explain a complete tutorial about how to fix Bitdefender installation failure. Keep reading to learn more.
Issues You May Face When Fixing Bitdefender Installation Failure
When you try to troubleshoot the Bitdefender installation failed issue, you may encounter potential problems, such as:
-
Conflicting antivirus or security software
-
Outdated operating system
-
Damaged or missing system files
-
Firewall or security software blocking installation
Solutions to Fix Bitdefender Installation Failed Issue
As a user, you want Bitdefender to be installed and run smoothly. Check out the following solutions to fix the Bitdefender installation failed issue:
Method 1: Remove Bitdefender and Other Security Solutions & Reinstall
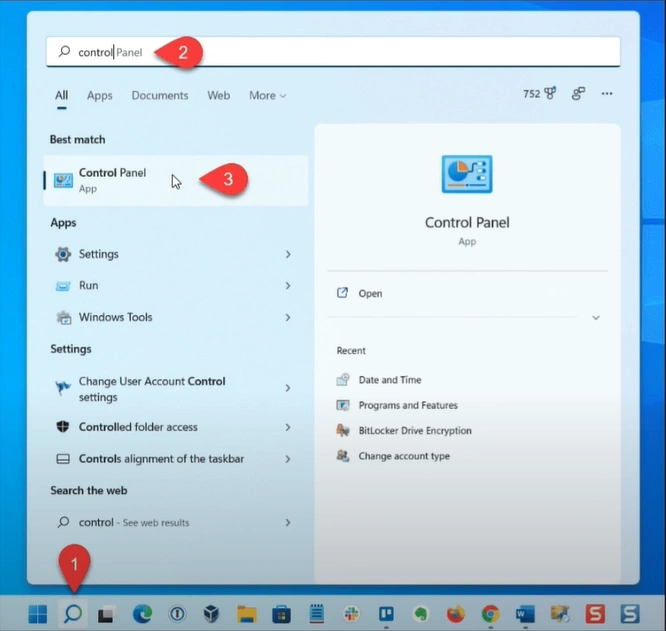
Step 1: Click on the Windows search menu, type in the Control Panel, and open it.
Step 2: Set View By to Large icons.
![]()
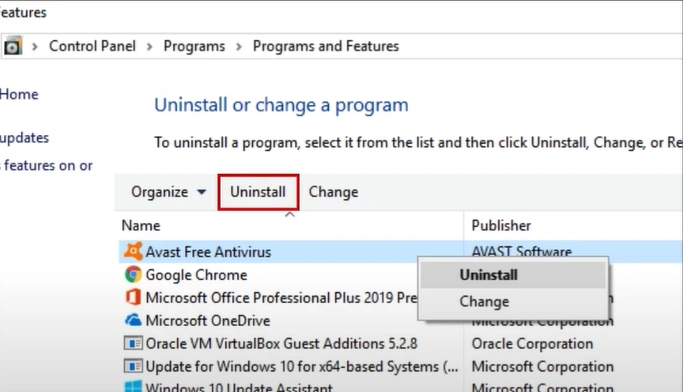
Step 3: Select Programs and Features, select the Bitdefender program, and click Uninstall.

Step 4: If prompted, select Yes to allow the app to make changes to the computer.

Step 5: If you get a pop-up window from Bitdefender, select Yes to proceed.

Step 6: The uninstallation process will take a while.

Step 7: Once the uninstallation process is completed, click Finish.

Step 8: Next, select the Bitdefender Agent program and click Uninstall.

Also Read:- How to Disable Bitdefender on Windows/Mac?
Step 9: Select Yes to allow the app to make changes to the computer.

Step 10: If there are any other security programs installed, select it and click Uninstall.

Step 11: Make sure to uninstall all the antivirus programs.
Step 12: Once done, close the window and restart your system.

Step 13: Click on the Windows search button, search Disk Cleanup, and open it.


Step 14: In the Disk Cleanup window, check all the files you want to remove.

Step 15: Click on Clean up System Files and wait for the Disk Cleanup to calculate the space.

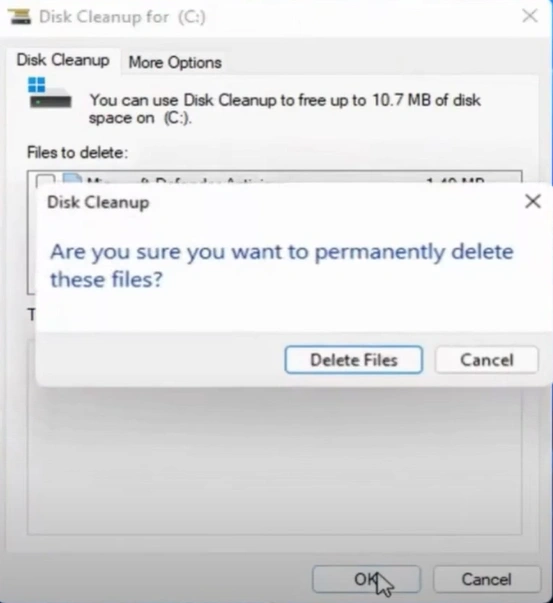
Step 16: Once done, click OK, then click Delete Files on the pop-up window.
Step 17: Wait for the cleanup process to complete.

Step 18: Now, reinstall the Bitdefender to your system.

Method 2: Run System File Checker (SFC)
Step 1: Click on the Windows search bar, type cmd, and click Run as Administrator to open Command Prompt.

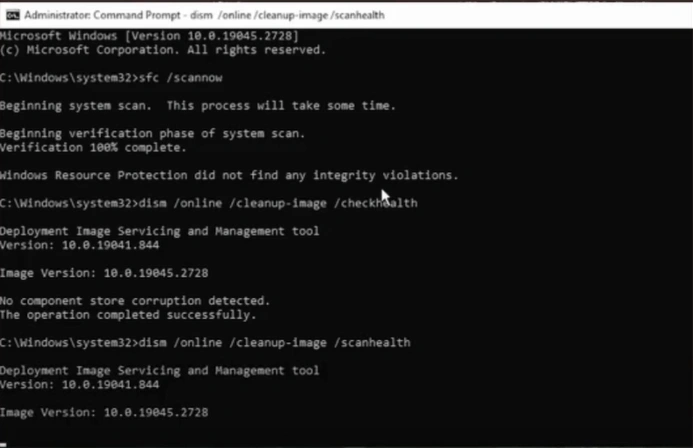
Step 2: In the Command Prompt window, type sfc /scannow and press Enter.

Step 3: It’ll start scanning the system, which will take some time.

Step 4: If it picks up any integrity violations, it will restore the missing and corrupted files.
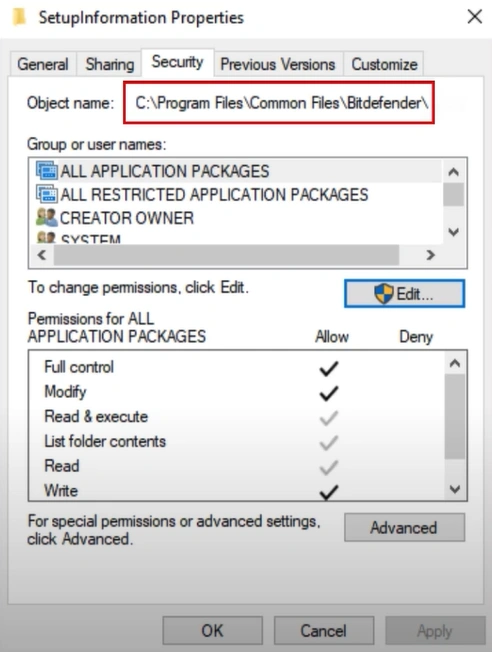
Method 3: Add Permission to Bitdefender Installation Folder
Step 1: First, create a Setup Information folder in C:\Program Files\Common Files\Bitdefender\SetupInformation\

Step 2: Right-click on the Setup Information folder and select Properties.

Step 3: Go to the Security tab and click Edit.

Step 4: Select your Windows username and check the Allow box next to Full Control.

Step 5: Click OK to save the changes.

Step 6: Make sure to set full permission for C:\Program Files\Bitdefender and C:\Program Files\Common Files\ Bitdefender folders as well.
To Sum Up
This concludes our guide on resolving the Bitdefender installation failure issue. Try the above solutions and start with the Bitdefender integrated into your system. When troubleshooting the issue, you may encounter certain problems. So, address these issues carefully to ensure a smooth process.
