How to Uninstall McAfee LiveSafe
McAfee LiveSafe can comprehensively safeguard a range of devices, such as Windows, Macs, iOS, and Android. It keeps away malware, viruses, spyware, and other online threats. But, there are situations wherein you need to uninstall this antivirus software.
McAfee LiveSafe may take up too much space, often leading to slow system performance or making it difficult to install new software or applications. It may even conflict with other software, causing system errors. These are a few reasons for uninstalling McAfee LiveSafe.

Sometimes, McAfee LiveSafe does not provide ample protection or detect malware effectively. This leads you to uninstall McAfee LiveSafe and look for other antivirus solutions. You may even notice your system slowing down, making it difficult to use it. So, you must completely delete McAfee LiveSafe from your system.
The following guide is all about the method to uninstall McAfee LiveSafe smoothly. Let’s go through it!
Potential Issues to Occur When Uninstalling McAfee LiveSafe
When the user attempts to uninstall McAfee LiveSafe, they may face certain issues during the process, such as:
-
Inability to uninstall in normal mode
-
McAfee reinstalls files after uninstall
-
Resource-intensive uninstall process
-
Conflict with Windows Defender
Methods to Uninstall McAfee LiveSafe
Before beginning the McAfee LiveSafe uninstallation process, save and close any open files or programs. Follow the below methods to uninstall McAfee LiveSafe:
Method 1: Using the Removal Tool
Step 1: If you don’t have the MCPR Tool in your system, open the web browser and visit the official McAfee website.
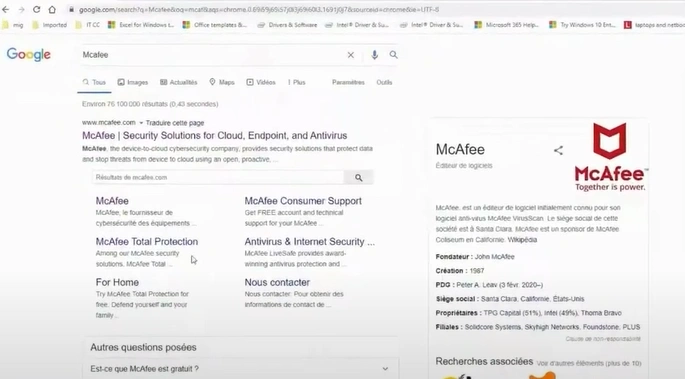
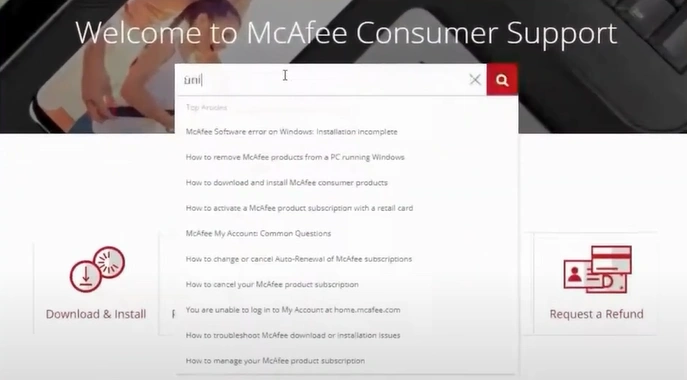
Step 2: Go to the Support page, search uninstall, and open the link from the search result.
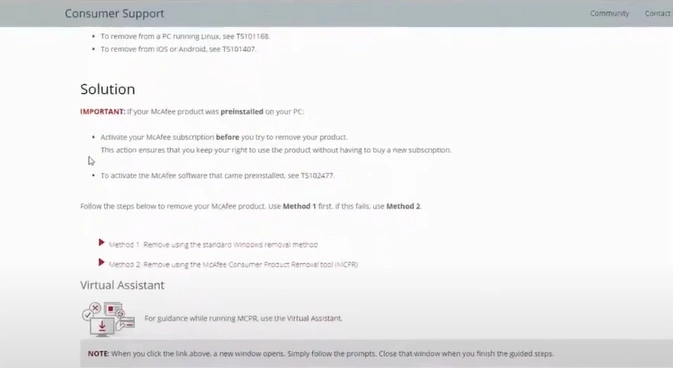
Step 3: Scroll down to Remove using the McAfee Consumer Product Removal Tool, then click the download the MCPR tool link.
Step 4: Wait for it to download, then open the downloaded file.
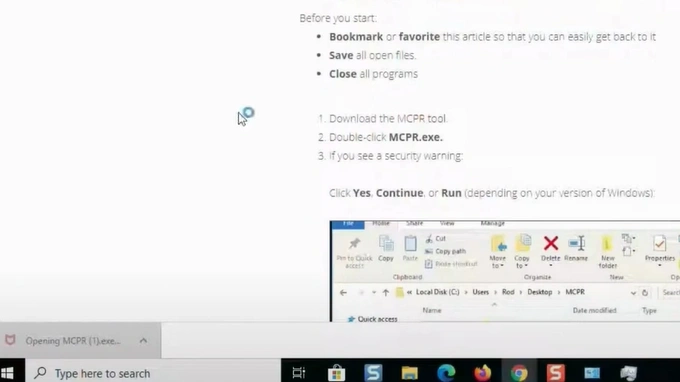
Step 5: When the McAfee Software Removal application loads, click Next.
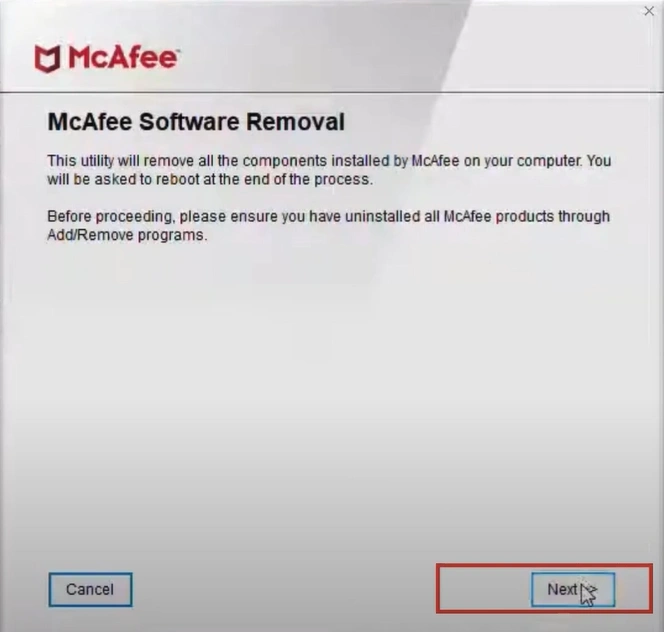
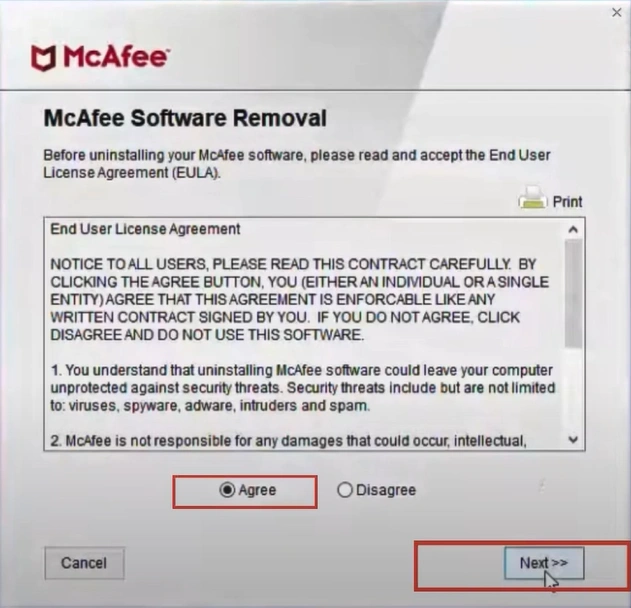
Step 6: Click Agree to agree to the license agreement and click Next.
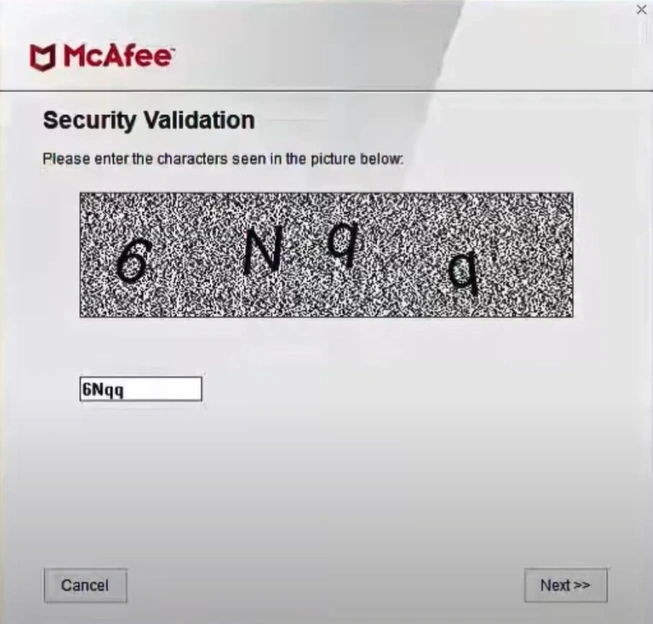
Step 7: Enter the Security Validation code displayed in the picture and click Next.
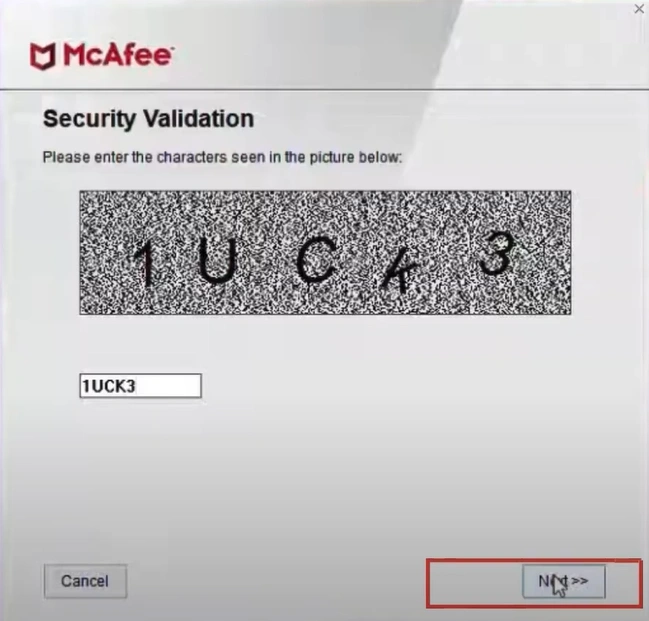
Step 8: Re-enter the security validation code if required, and it’ll start preparing for the uninstallation process.
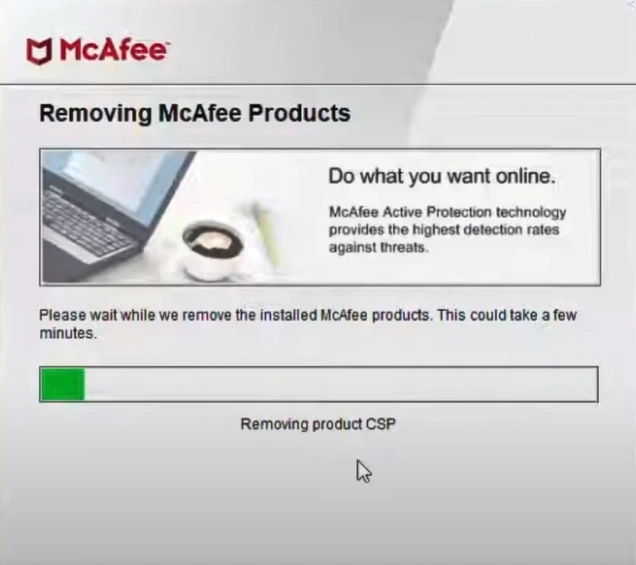
Step 9: The uninstallation process will take a while, so ensure the system stays connected to the internet throughout the process.
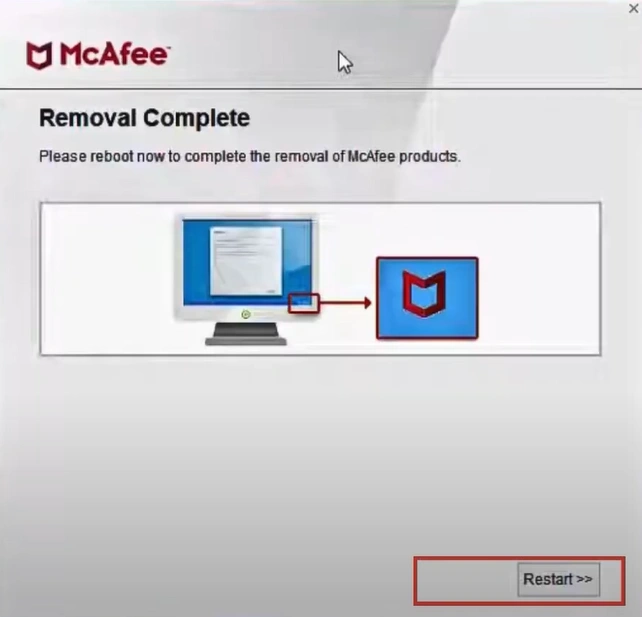
Step 10: When you get the Removal Complete screen, go to the control panel and check if the program is completely removed.
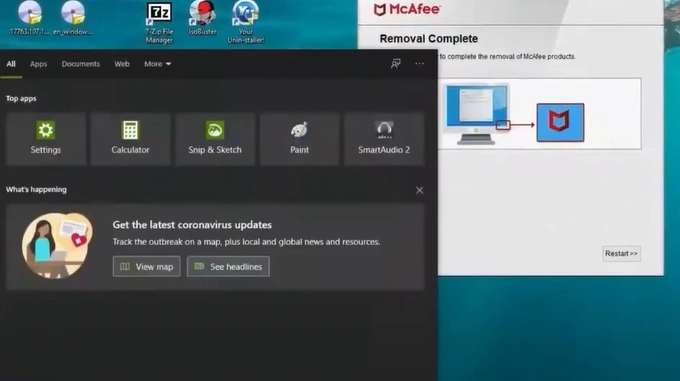
Step 11: Once confirmed, click Restart to restart the system.
Method 2: From Programs and Features
Step 1: Click the Windows search bar, search the Control Panel, and open it.
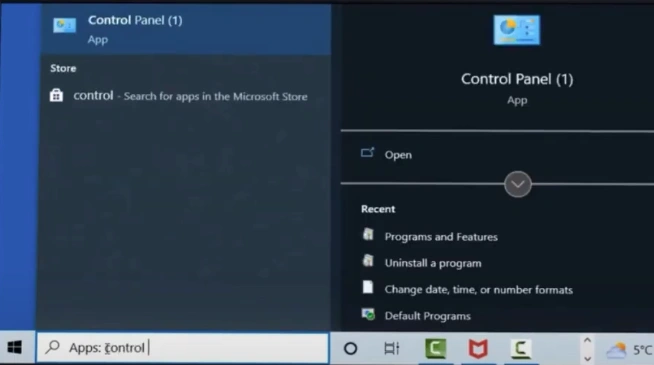
Step 2: Go to Programs and select Programs and Features.
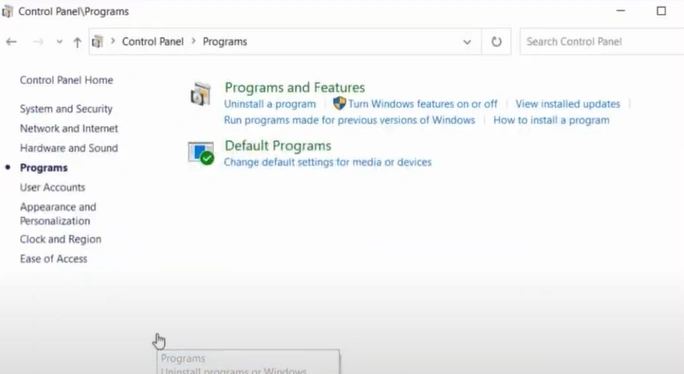
Step 3: Locate and click McAfee LiveSafe.
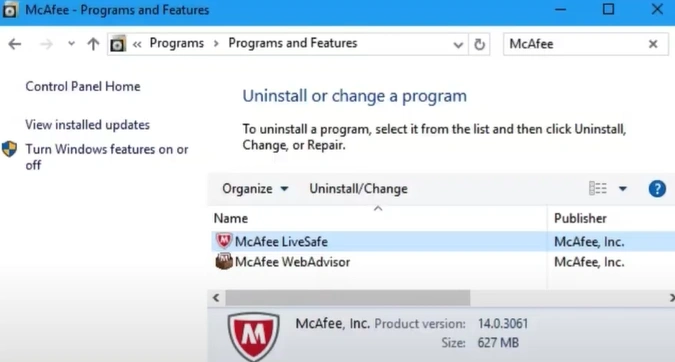
Step 4: Click Uninstall/Change, then click Yes in the User Account Control window.
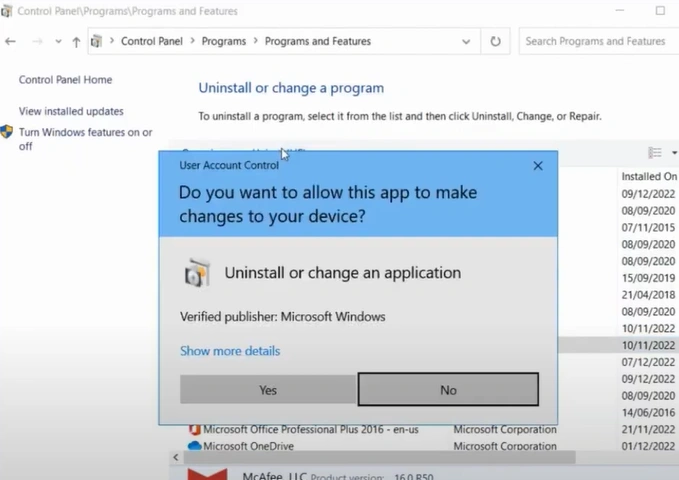
Step 5: Select your McAfee program and click Uninstall.
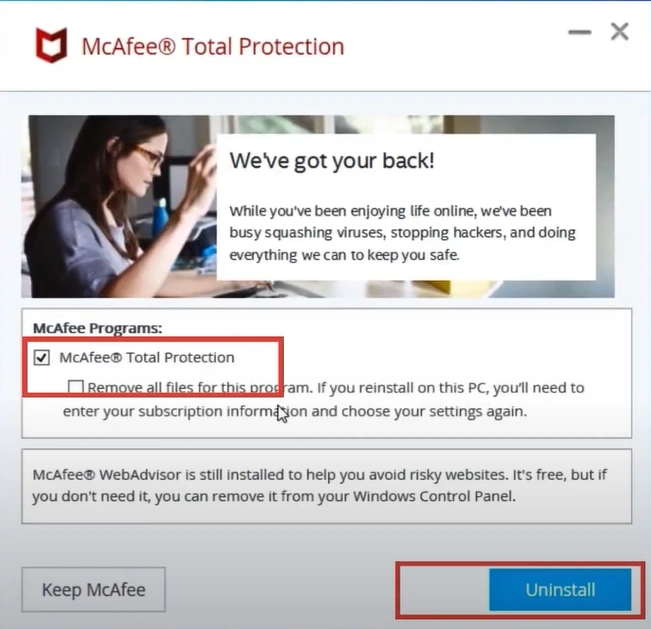
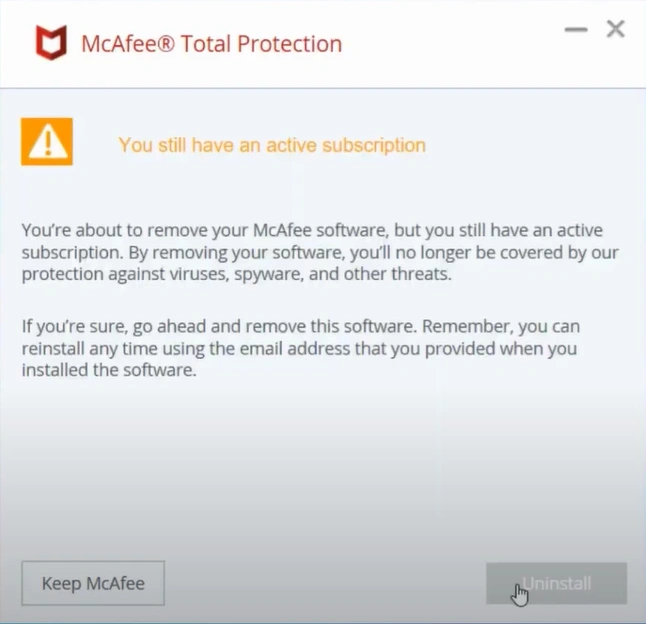
Step 6: Click Uninstall again, and it’ll take a few minutes to remove the program.
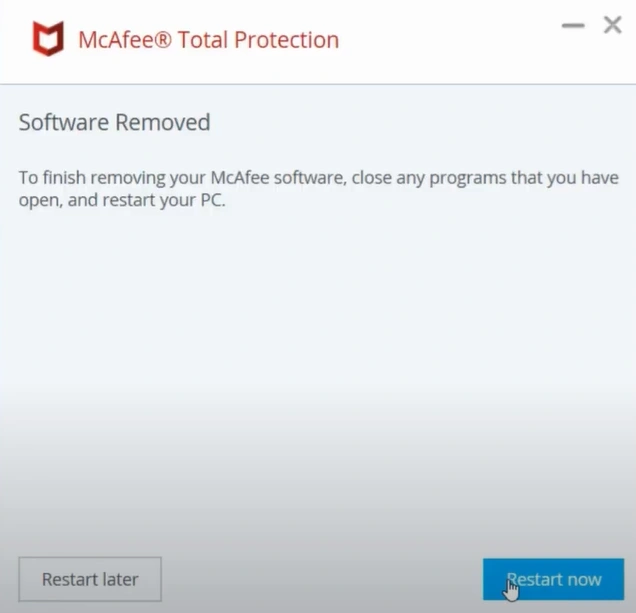
Step 7: Once the software is removed, click Restart Now.
To Conclude
There can be risks of other security software installed in your system conflicting with McAfee LiveSafe. So, avoid that by temporarily disabling or uninstalling it. Adhere to the above steps and ensure a hassle-free uninstallation of McAfee LiveSafe. If you face any problems while uninstalling the antivirus program, restart your system and try uninstalling again.
Contact a professional if you need further assistance uninstalling McAfee LiveSafe.


 Bitdefender antivirus issues
1 min ago